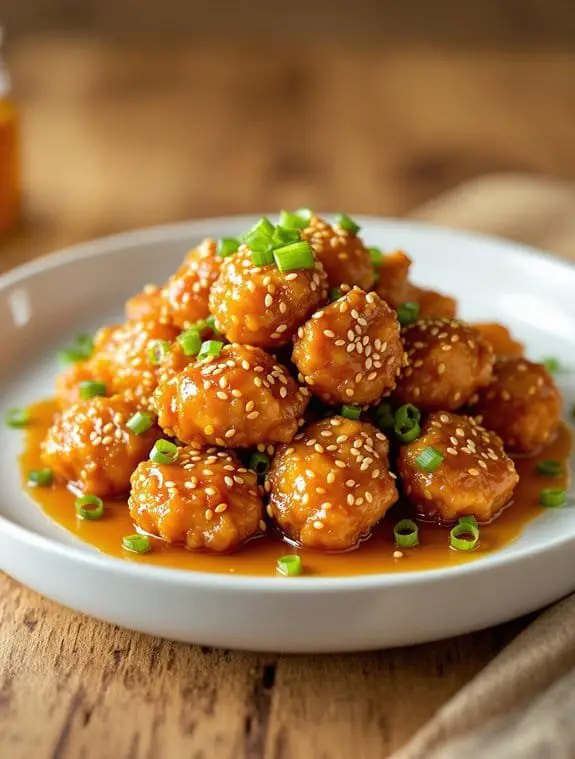
Crispy Honey-Sesame Chicken Recipe

I’ve spent way too many nights scrolling through takeout apps, craving that perfect balance of crispy chicken and sticky-sweet sauce. You know the feeling – when you want restaurant-quality flavors but your wallet’s giving you the side-eye. This honey-sesame chicken hits all those cravings without the delivery fees or the mystery ingredients. The secret lies in getting that coating impossibly crunchy while keeping the sauce from turning everything soggy, and I’m about to show you exactly how to nail it.
Why You’ll Love this Crispy Honey-Sesame Chicken
When you’re craving that perfect balance of sweet and savory with a crunch that’ll make your taste buds dance, this crispy honey-sesame chicken delivers every single time.
I’m talking about chicken so satisfying, you’ll forget all about takeout.
What makes this recipe special? That double coating creates an impossibly crispy exterior that stays crunchy even after saucing.
The honey-sesame glaze hits all the right notes, sweet with just enough tang.
Plus, you control the ingredients. No mystery sauces or questionable chicken quality.
Just pure, homemade goodness that’ll have everyone asking for seconds.
What Ingredients are in Crispy Honey-Sesame Chicken?
Let me break down exactly what goes into this crispy honey-sesame chicken masterpiece. The ingredient list is surprisingly straightforward, which I love because it means you probably already have most of these pantry staples hanging around your kitchen.
The magic happens when these simple ingredients come together. You’ve got your protein, your coating components, and that gorgeous sweet-savory sauce that makes everything worth it. Nothing fancy or hard to find, just good honest ingredients doing their job.
For the Chicken:
- 1½ pounds boneless, skinless chicken breasts, cut into 1-inch pieces
- 2 eggs
- ½ cup all-purpose flour
- ½ cup cornstarch
For the Honey-Sesame Sauce:
- 1 teaspoon garlic, minced
- ¼ cup honey
- ¼ cup soy sauce
- 2 tablespoons ketchup
- 3 tablespoons brown sugar
- 2 tablespoons rice vinegar
- 1 tablespoon sesame oil
- 2 tablespoons sesame seeds
- Sliced green onions for garnish
Quality Matters, But Don’t Stress
When it comes to chicken, I always go for the good stuff if my budget allows. Those organic, free-range breasts make a difference in flavor, but honestly, regular chicken breasts work perfectly fine too. Just make sure they’re fresh and cut them into uniform pieces so everything cooks evenly.
The cornstarch is your secret weapon here. While flour gives structure, cornstarch creates that shatteringly crispy coating we’re after. Don’t skip it, and definitely don’t substitute it with more flour, because you’ll miss out on that signature crunch.
For the sauce ingredients, sesame oil packs serious flavor punch, so a little goes a long way. If you’ve had that bottle sitting in your pantry for ages, give it a sniff first. Sesame oil can go rancid, and trust me, you’ll know.
Rice vinegar adds the perfect acidic balance, but white vinegar works in a pinch if that’s what you’ve got.
How to Make this Crispy Honey-Sesame Chicken
First things first, let’s tackle that chicken. Take your 1½ pounds of boneless, skinless chicken breasts and cut them into roughly 1-inch pieces. I know it’s tempting to make some pieces bigger because more chicken equals more happiness, right? But trust me on this one, uniform pieces mean everything cooks at the same rate, and nobody wants to bite into a piece that’s still doing its chicken impression on the inside.
Crack those 2 eggs into a bowl and give them a good whisking. In a separate bowl, combine your ½ cup flour with ½ cup cornstarch. This is where the magic coating lives, so don’t skip the cornstarch part. I can’t stress this enough.
The Coating Dance
Now comes the fun part that always makes me feel like I’m in some kind of culinary assembly line. Dip each piece of chicken into the egg mixture first, making sure it’s completely coated. Let any excess egg drip off because nobody wants soggy coating, then roll it around in that flour-cornstarch mixture until it’s completely covered.
Some people like to do a double dip situation, but honestly, one good coating does the trick if you’re thorough about it. Just make sure every nook and cranny gets covered because those are the spots that’ll stay pale and sad if you miss them.
Frying Like a Pro
Heat your oil to 350°F in a heavy-bottomed pot or deep fryer. If you don’t have a thermometer, drop a small piece of the coating mixture into the oil. If it sizzles immediately and floats to the surface, you’re golden.
Too hot and your coating burns before the chicken cooks through, too cool and you’ll end up with greasy, soggy chicken that makes everyone sad.
Carefully add your coated chicken pieces to the oil, but don’t crowd them. I know it’s tempting to dump everything in at once and call it a day, but overcrowding drops the oil temperature and creates a steamy mess instead of crispy perfection. Fry for about 5 minutes, or until they’re golden brown and floating like little crispy clouds.
Sauce Magic Time
While your chicken is doing its thing in the oil, let’s whip up that honey-sesame sauce. In a small saucepan, combine 1 teaspoon minced garlic, ¼ cup honey, ¼ cup soy sauce, 2 tablespoons ketchup, 3 tablespoons brown sugar, 2 tablespoons rice vinegar, and 1 tablespoon sesame oil.
Cook this gorgeous mixture over medium heat, stirring constantly because sugar loves to burn when you’re not looking. You’ll know it’s ready when it thickens enough to coat the back of a spoon, usually about 3-4 minutes. The smell alone will have you questioning why you ever ordered takeout.
The Grand Finale
Once your chicken is perfectly crispy and your sauce is glossy and thick, it’s time for the moment we’ve all been waiting for. Toss that hot, crispy chicken in the sauce until every piece is evenly coated.
You want each bite to have that perfect balance of crunch and sticky sweetness. Sprinkle those 2 tablespoons of sesame seeds over the top along with some sliced green onions for garnish.
The sesame seeds add this nutty crunch that makes everything feel more authentic somehow, plus they look pretty sitting there all golden and perfect.
Serve this beauty immediately while the coating is still crispy and the sauce is still glossy. Because let’s be honest, this dish waits for no one.
Crispy Honey-Sesame Chicken Substitutions and Variations
This recipe is pretty flexible, and I love that about it because sometimes you’re standing in your kitchen realizing you’re missing half the ingredients but you’re already committed to the whole honey-sesame chicken dream.
No rice vinegar? Apple cider vinegar works perfectly. Out of cornstarch? Use all flour, though it won’t be quite as crispy.
Want it spicier? Add sriracha to the sauce. Prefer thighs over breasts? They’ll actually stay juicier.
You can swap maple syrup for honey, use tamari instead of soy sauce, or even try this with cauliflower florets for a vegetarian twist.
What to Serve with Crispy Honey-Sesame Chicken
When you’ve got this gorgeous, glossy honey-sesame chicken ready to devour, the side dishes need to pull their weight without stealing the show.
I always reach for fluffy jasmine rice first—it’s like a neutral canvas that soaks up every drop of that sticky-sweet sauce.
Steamed broccoli adds the crunch factor, plus it makes me feel slightly better about the whole fried situation.
Asian cucumber salad brings cool, invigorating contrast to all that richness.
Want something heartier? Fried rice or lo mein noodles work beautifully, though honestly, sometimes simple steamed vegetables let the chicken shine brightest.
Final Thoughts
After all the frying and saucing and inevitable kitchen cleanup, you’ll have created something pretty magical—crispy chicken that’s both indulgent and surprisingly sophisticated.
This recipe hits that sweet spot between restaurant-quality and totally doable at home. The honey-sesame combination never gets old, and honestly, who doesn’t love food that’s both sticky and crunchy?
I think you’ll find this becomes one of those go-to recipes when you want something special but don’t want to overthink it.
Simple ingredients, big flavors, happy family.
Crispy Honey-Sesame Chicken


Ingredients
For the Chicken:
- 1 1/2 lbs boneless skinless chicken breasts, cut into 1-inch pieces
- 2 eggs beaten
- 1/2 cup all-purpose flour
- 1/2 cup cornstarch
- Oil for frying
For the Sauce:
- 1/4 cup honey
- 1/4 cup soy sauce
- 2 tablespoons ketchup
- 3 tablespoons brown sugar
- 2 tablespoons rice vinegar
- 1 tablespoon sesame oil
- 1 teaspoon garlic minced
For Garnish:
- 2 tablespoons sesame seeds
- Sliced green onions
Instructions
- Heat oil in a large pot or deep fryer to 350°F.
- In a shallow bowl, whisk together flour and cornstarch. Beat eggs in a separate bowl.
- Dip each piece of chicken first in the beaten eggs, then coat thoroughly in the flour mixture.
- Fry chicken pieces in batches for 5 minutes or until golden brown and cooked through. Remove and drain on paper towels.
- In a small saucepan, combine honey, soy sauce, ketchup, brown sugar, rice vinegar, sesame oil, and minced garlic.
- Cook sauce over medium heat, stirring constantly, until thickened and glossy, about 3-4 minutes.
- Toss fried chicken in the warm sauce until evenly coated.
- Sprinkle with sesame seeds and sliced green onions before serving immediately.
Notes
Nutrition
Frequently Asked Questions
Can I Make This Recipe in an Air Fryer Instead of Deep Frying?
Yes, I’d recommend air frying the chicken at 380°F for 12-15 minutes, flipping halfway through. You’ll still get crispy results without deep frying, then toss with sauce.
How Long Can I Store Leftover Sesame Chicken in the Refrigerator?
I’d store your leftover sesame chicken in the refrigerator for up to three days. Make sure you keep it in an airtight container to maintain freshness and prevent contamination from other foods.
Can I Prepare the Chicken Coating Mixture Ahead of Time?
Yes, I’d recommend preparing the coating mixture ahead of time. You can mix the flour and cornstarch together and store it in an airtight container for several days until you’re ready to cook.
What’s the Best Way to Reheat Leftover Sesame Chicken While Keeping It Crispy?
I’ll reheat your sesame chicken in a 400°F oven for 8-10 minutes on a wire rack. This’ll crisp the coating better than microwaving, which makes it soggy and chewy.
Can I Use Chicken Thighs Instead of Chicken Breasts for This Recipe?
I’d absolutely recommend using chicken thighs instead of breasts. They’ll stay juicier and more tender while still getting crispy. The cooking time remains the same, but you’ll get better flavor.