Kadai Chicken Recipe: Indian Wok-Style Cooking

I’ll confess something right off the bat – when I first heard “kadai chicken,” I thought it was some fancy restaurant secret I’d never master at home. Turns out, this Indian wok-style dish is surprisingly straightforward, and you probably already have most of the spices sitting in your pantry right now. The real magic happens when those aromatic spices hit the hot oil, but there’s one essential step that most people completely skip.
Why You’ll Love this Kadai Chicken
Three reasons make this kadai chicken absolutely irresistible, and trust me, once you smell that ghee hitting the pan with those whole red chilies, you’ll understand why this dish has stolen hearts across India.
First, it’s practically foolproof. You’re basically throwing everything into one wok, which means fewer dishes and less stress.
Second, those red capsicums add this amazing sweet crunch that balances the heat perfectly.
Third, the ghee creates this rich, aromatic base that makes your kitchen smell like heaven. I mean, who doesn’t want their house smelling like an Indian restaurant?
What Ingredients are in Kadai Chicken?
Getting your kadai chicken ingredients together is honestly the most satisfying part of the whole process.
There’s something magical about seeing all these vibrant spices and fresh vegetables lined up on your counter, knowing you’re about to create something absolutely delicious.
The beauty of this recipe lies in its simplicity – most of these ingredients are probably already hanging out in your pantry or fridge. You won’t need to hunt down any exotic spices or make special trips to fancy grocery stores, which makes this dish perfect for those weeknight cravings when you want something special but don’t want the hassle.
Vital Ingredients for Kadai Chicken:
- 1 kg chicken (about 2.2 pounds)
- 50 g ghee (roughly 3-4 tablespoons)
- 25-35 g ginger-garlic paste (about 2-3 tablespoons)
- 8 whole red chilies
- 5 g coriander powder (about 1 teaspoon)
- 2 medium onions
- 4 green chilies
- 20 g fresh coriander leaves (about 3/4 cup chopped)
- 10 g garam masala (about 1 tablespoon)
- 1 kg tomatoes (about 6-8 medium tomatoes)
- 3 red capsicums (red bell peppers)
- Salt to taste
Ingredient Notes and Substitutions
Let’s talk about that ghee first – it’s really the star of the show here. If you can’t find ghee or you’re watching your budget, you can substitute with butter or even a neutral oil, but honestly, ghee gives this dish its authentic flavor.
You’ll find it in most grocery stores now, usually near the oils or in the international aisle.
The whole red chilies are essential for that smoky heat, but don’t panic if yours look a bit different from what you see in restaurant photos.
Any dried red chilies will work – cayenne, guajillo, or even those little packets that come with takeout orders. Just make sure they’re not completely ancient and crumbly.
Fresh ginger-garlic paste makes a world of difference compared to the jarred stuff, but let’s be real – sometimes convenience wins.
If you’re making your own, just blend equal parts fresh ginger and garlic with a tiny splash of water. Your food processor will thank you for peeling everything first.
Those red capsicums, or bell peppers if we’re being less fancy, add this gorgeous color and sweet crunch that makes kadai chicken distinctive.
Green bell peppers work too, but red ones are traditionally used and they’re usually sweeter. Don’t skip them – they’re not just for looks.
How to Make this Kadai Chicken

Making kadai chicken is one of those cooking experiences that feels intimidating at first but becomes second nature once you get the hang of it. The secret is having everything prepped and ready to go before you even think about turning on that burner, because once you start, this dish moves pretty quickly.
Getting Your Prep Work Done
First things first – let’s deal with that 1 kg chicken. You’ll want to skin it and cut it into 8 pieces, which sounds way more complicated than it actually is. If you’re working with a whole chicken, just think of it like breaking down into two thighs, two drumsticks, two wings, and two breast pieces. Don’t stress about making them perfectly uniform – rustic is totally fine here, and honestly, some people prefer the varied textures you get from different cuts.
While you’re in chopping mode, tackle all your vegetables at once. Those 1 kg tomatoes need to be chopped into chunky pieces – not tiny dice, but not massive wedges either. Think bite-sized. Do the same with your 2 onions, 4 green chilies, and 3 red capsicums. The 20 g fresh coriander leaves just need a rough chop too. Having everything in separate little bowls makes you feel like a cooking show host, plus it actually makes the cooking process so much smoother.
The Cooking Process Begins
Heat that 50 g ghee in your wok or heavy-bottomed pan over medium heat. You’ll know it’s ready when it starts to shimmer slightly – don’t let it smoke or you’ll end up with bitter flavors that’ll haunt your entire dish. Toss in those 8 whole red chilies first and let them sizzle for just a few seconds until they start to darken and release their aroma.
Next come your chopped onions, which need to sauté until they’re light brown. This takes patience – probably about 5-7 minutes of stirring occasionally. You want them translucent and golden, not caramelized to death, but definitely not raw and sharp either. There’s this sweet spot where they’re just starting to catch some color around the edges.
Building the Flavor Base
Once your onions hit that perfect light brown stage, stir in your 25-35 g ginger-garlic paste and keep stirring for about a minute. You’ll smell this incredible fragrant cloud rising from the pan – that’s when you know you’re on the right track. Follow this immediately with your 5 g coriander powder, giving it just a few seconds to bloom in the hot oil.
Now comes the tomato party. Add all those chopped tomatoes and let them fry down, stirring occasionally. This is where patience really pays off because you want them to break down and release their juices, creating this thick, saucy base. After they’ve been cooking for a few minutes and started to soften, add your 4 green chilies to the mix.
Bringing It All Together
Let everything simmer together for 5-6 minutes, stirring occasionally and watching as the tomatoes continue breaking down into a chunky sauce. The mixture should be bubbling gently, not violently boiling. This simmering time is vital because it’s when all those flavors start getting acquainted with each other.
Time to add your star ingredients – the chicken pieces and those 3 chopped red capsicums. Stir everything together so the chicken gets coated with all that gorgeous tomato-onion mixture. Now comes the slightly tricky part: you need to cook this until the fat starts floating on top and the gravy becomes thick, while making sure your chicken is completely cooked through.
This usually takes about 15-20 minutes, depending on the size of your chicken pieces. You’ll know you’re getting close when you can see little pools of ghee starting to separate from the sauce, and when you poke the thickest piece of chicken, the juices run clear rather than pink.
The Final Touches
When your chicken is cooked and that gravy has reached the perfect consistency – thick enough to coat the back of a spoon but not so thick it’s paste-like – sprinkle in your 10 g garam masala. This warming spice blend is what gives kadai chicken its distinctive flavor, so don’t skip it or substitute it with something else.
Add your chopped 20 g coriander leaves and give everything a final stir. Taste for salt and seasoning now – this is your last chance to adjust anything before serving. Sometimes the tomatoes are more acidic than expected, sometimes you need a pinch more salt to bring all the flavors together.
Transfer everything to your serving wok or dish and garnish with some extra chopped coriander leaves and a few tomato slices for that restaurant-style presentation. The whole thing should look vibrant and smell absolutely incredible – if your kitchen doesn’t smell like the best Indian restaurant in town right now, something went wrong.
Kadai Chicken Substitutions and Variations
One thing I absolutely love about kadai chicken is how forgiving it’s when you need to make swaps based on what’s actually sitting in your fridge.
No red capsicum? Green bell peppers work perfectly fine. Out of ghee? Regular oil won’t hurt your feelings.
I’ve seen people swap chicken thighs for breasts, though thighs stay juicier. Want heat? Double those green chilies. Prefer mild? Cut them in half.
You can even throw in mushrooms, baby potatoes, or paneer for variety. The tomato-ginger base plays nice with almost everything, making this recipe practically swap-proof.
What to Serve with Kadai Chicken
When it comes to pairing kadai chicken, you’ve got some seriously delicious options that’ll make your taste buds do a little happy dance.
I always reach for buttery naan or fluffy basmati rice first – they’re perfect for soaking up that rich, tomato-capsicum gravy.
Want something lighter? Chapati works beautifully too.
For a complete feast, I’ll add some cooling raita, maybe cucumber or mint, to balance the spices. A simple dal on the side never hurts either.
Honestly, you can’t go wrong here. The key is having something to catch every last drop of that gorgeous sauce.
Final Thoughts
There’s something magical about pulling together a dish that feeds both body and soul, and kadai chicken hits that sweet spot every single time.
I love how this recipe transforms simple ingredients into something extraordinary. The aromatic spices, tender chicken, and vibrant vegetables create a symphony of flavors that’ll make your kitchen smell like heaven.
This dish proves you don’t need complicated techniques to create restaurant-quality food at home. With practice, you’ll develop your own rhythm with the spices and timing.
Trust your instincts, taste as you go, and most importantly, enjoy the process.
Kadai Chicken
Equipment

Ingredients
- 1 kg chicken skinned and cut into 8 pieces
- 50 g ghee
- 25-35 g ginger-garlic paste
- 8 whole red chilies
- 5 g coriander powder
- 2 onions chopped
- 4 green chilies chopped
- 20 g fresh coriander leaves chopped
- 10 g garam masala
- 1 kg tomatoes chopped
- 3 red capsicums chopped
- Salt to taste
Instructions
- Skin the chicken and cut into 8 pieces. Set aside.
- Chop tomatoes, green chilies, coriander leaves, onions, and capsicum.
- Heat ghee in a wok over medium heat.
- Add whole red chilies to the hot ghee, then add chopped onions.
- Sauté onions until light brown.
- Add ginger-garlic paste and stir for a minute.
- Add coriander powder and mix well.
- Add chopped tomatoes and fry until they break down.
- Add green chilies to the mixture.
- Simmer for 5-6 minutes until the tomatoes are well cooked.
- Add chicken pieces and capsicum to the wok.
- Cook until fat floats on top, gravy is thick, and chicken is completely cooked.
- Sprinkle garam masala over the dish.
- Add fresh coriander leaves and stir gently.
- Taste and adjust salt and seasoning as needed.
- Remove onto a serving wok and garnish with chopped coriander leaves and tomato slices.
Notes
- For extra heat, increase the number of green chilies or add red chili powder to taste
- The dish is ready when fat separates and floats on top of the gravy – this indicates proper cooking
- You can substitute red capsicum with green or yellow bell peppers for color variation
- Make sure to cook tomatoes completely before adding chicken to avoid raw tomato taste
- This dish tastes even better the next day as flavors develop overnight
- For a richer taste, marinate chicken pieces in yogurt and spices for 30 minutes before cooking
- Adjust the consistency by adding water if gravy becomes too thick during cooking
Nutrition
Frequently Asked Questions
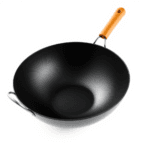
Can I Make Kadai Chicken Without a Wok or Kadai Pan?
You can absolutely make kadai chicken without a traditional wok or kadai pan. I’d recommend using a heavy-bottomed skillet or deep frying pan instead. The key is high heat and proper stirring technique.
How Long Can I Store Leftover Kadai Chicken in the Refrigerator?
I’d store your leftover kadai chicken in the refrigerator for up to three days maximum. Make certain I cover it tightly and reheat thoroughly before eating to guarantee it’s safe and maintains good flavor.
Is Kadai Chicken Spicy and Can I Reduce the Heat Level?
I’d say kadai chicken has moderate heat from the red and green chilies. You can reduce spiciness by using fewer chilies, removing seeds, or adding yogurt to the gravy.
What’s the Difference Between Kadai Chicken and Butter Chicken?
I’ll explain the key differences between these two popular dishes. Kadai chicken’s cooked in a wok with tomatoes and capsicum, creating a drier texture, while butter chicken features a creamy, rich sauce.
Can I Freeze Kadai Chicken and How Do I Reheat It?
Yes, I can freeze kadai chicken for up to three months in airtight containers. I’ll reheat it gently on stovetop or microwave, adding water if needed to restore consistency.