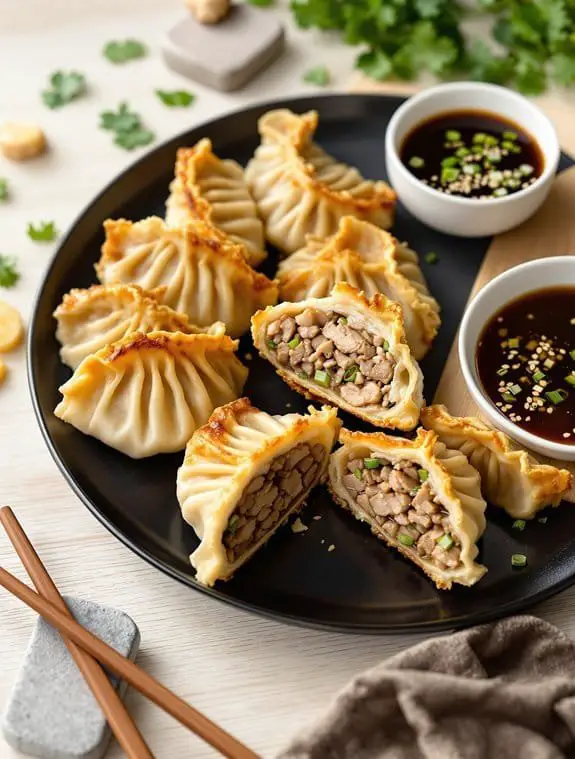
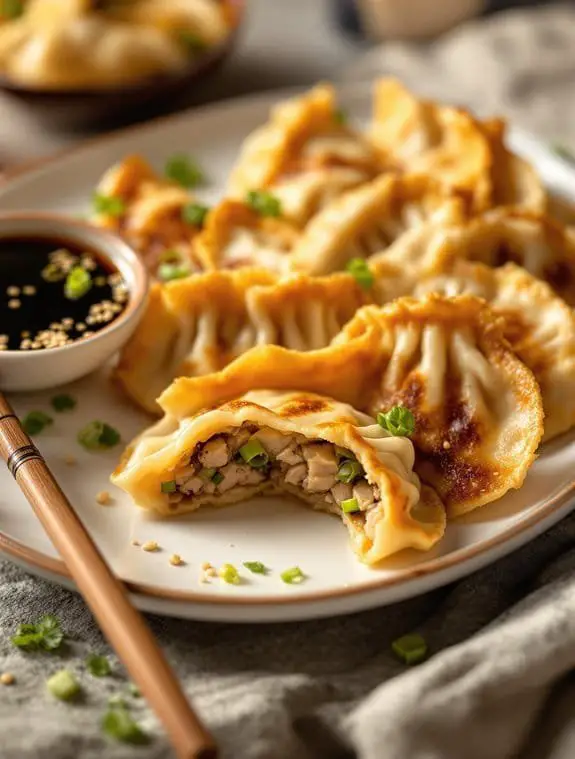
Crispy Homemade Pork Potstickers Recipe
I’m going to let you in on a little secret – making restaurant-quality potstickers at home isn’t nearly as intimidating as you might think. Sure, your first few attempts might look like wonky little purses rather than elegant dumplings, but here’s the thing: even the ugliest potsticker tastes absolutely incredible when it’s got that perfect golden-crispy bottom and tender, juicy filling. Want to know the tricks that’ll have you cranking out perfect potstickers?
Why You’ll Love these Crispy Homemade Pork Potstickers
Because nothing beats the satisfaction of biting into a perfectly crispy-bottomed dumpling that you made with your own two hands, these pork potstickers will become your new obsession.
I mean, can we talk about that contrast? The golden, crackling bottom against the silky steamed top creates this incredible texture symphony in your mouth. Plus, the filling hits all the right notes with savory pork, fresh ginger, and that hint of oyster sauce.
They’re surprisingly forgiving too. Even if your pleating looks like abstract art, they’ll still taste amazing. Perfect for impressing guests or satisfying midnight cravings.
What Ingredients are in Crispy Homemade Pork Potstickers?
These crispy pork potstickers rely on a surprisingly simple lineup of ingredients that you probably already have lurking in your kitchen. The beauty lies in how these everyday components transform into something that tastes like it came from your favorite dim sum restaurant.
Most of these ingredients are pantry staples, which makes this recipe perfect for those spontaneous dumpling cravings. The only specialty item you might need to hunt down are the potsticker wrappers, but trust me, they’re worth the trip to the Asian grocery store.
Ingredients:
- ½ pound ground pork
- 1 cup finely chopped cabbage
- 2 green onions, finely chopped
- 2 cloves garlic, minced
- ½ tablespoon minced ginger
- 1½ tablespoons rice vinegar
- ½ tablespoon oyster sauce
- ½ teaspoon cornstarch (plus more for dusting pan)
- ⅛ teaspoon black pepper
- 1 (12-ounce) package potsticker wrappers
- 2 tablespoons peanut or vegetable oil
- ⅔ cup low-sodium chicken broth
Ingredient Notes and Substitutions
Let’s talk about that ground pork for a second. You want something with a bit of fat content, around 80/20 if possible, because lean pork will give you dry, sad dumplings. If pork isn’t your thing, ground chicken or turkey work beautifully, though you might want to add an extra splash of oil to the filling.
The cabbage adds essential crunch and helps absorb excess moisture from the filling. Make sure you chop it super fine, almost like confetti, or it’ll poke through those delicate wrappers. Napa cabbage works even better if you can find it, but regular green cabbage does the job just fine.
Rice vinegar brings a subtle tang that brightens the whole filling, but apple cider vinegar can pinch-hit if needed. Just use a little less since it’s more acidic. The oyster sauce is where the magic happens, adding that deep, savory umami flavor that makes these taste restaurant-quality.
Those potsticker wrappers are usually found in the freezer section of Asian markets or larger grocery stores. Round gyoza wrappers work perfectly too. Just make sure they’re thawed completely before you start filling, or you’ll end up with torn wrappers and filling everywhere.
How to Make these Crispy Homemade Pork Potstickers
Making these potstickers is honestly one of those therapeutic cooking activities that’ll have you wondering why you ever ordered takeout. The process breaks down into three main steps: making the filling, assembling the dumplings, and then the magical pan-frying technique that gives you those coveted crispy bottoms. Trust me, once you get the hang of the pleating, you’ll be cranking these out like a dumpling machine.
Making the Filling
Start by combining your ½ pound ground pork with 1 cup finely chopped cabbage, 2 finely chopped green onions, 2 minced garlic cloves, and ½ tablespoon minced ginger in a large bowl. The key here is getting everything evenly distributed, so don’t be shy about using your hands to really mix things together.
Add 1½ tablespoons rice vinegar, ½ tablespoon oyster sauce, ½ teaspoon cornstarch, and ⅛ teaspoon black pepper to the mix. The filling should feel slightly sticky and hold together when you squeeze it, which means the cornstarch is doing its job.
Here’s where I need to share a hard-learned lesson about moisture control. That cabbage is going to release water, and if you don’t account for it, you’ll end up with soggy dumplings that fall apart. Some people salt their cabbage and drain it first, but honestly, the cornstarch does enough heavy lifting if you work efficiently and don’t let the filling sit around for hours.
Assembling the Potstickers
Now comes the fun part that might make you question your manual dexterity at first. Grab your 12-ounce package of potsticker wrappers and set up a little assembly line. Keep the wrappers under a damp towel because they dry out faster than you’d think, and nobody wants to deal with cracked wrappers.
Place about a teaspoon of filling right in the center of each wrapper. And I mean right in the center, because off-center filling leads to lopsided dumplings that refuse to sit flat in the pan.
The pleating technique is where people get intimidated, but it’s really just about creating little folds along one edge while keeping the other edge smooth. Hold the wrapper like a taco, then use your thumb and forefinger to create small pleats, pressing each one firmly against the smooth back edge.
Don’t overfill these little guys, even if it seems like you’re being stingy with the filling. A teaspoon really is enough because overstuffed dumplings are basically guaranteed to burst open during cooking, leaving you with a pan full of loose filling and sad, deflated wrappers.
The Pan-Frying Magic
This is where the “potsticker” gets its name, and where technique really matters. Heat 2 tablespoons of peanut or vegetable oil in a large skillet over medium-high heat. You want the pan hot enough that the oil shimmers but doesn’t smoke.
Place your potstickers in the pan with the crimped, pleated side facing up and make sure they’re not touching each other, or they’ll literally stick together and create one giant mega-dumpling.
Let them fry undisturbed for 3 to 4 minutes until the bottoms turn golden brown. I can’t stress this enough: don’t peek, don’t poke, don’t even think about moving them around. That golden crust is developing, and every time you lift a dumpling to check, you’re basically starting over.
Once you’ve got those beautiful golden bottoms, quickly add ⅔ cup low-sodium chicken broth to the pan. It’s going to sizzle dramatically and create a lot of steam, so don’t freak out when it sounds like your kitchen is under attack.
Immediately cover the pan and let everything steam for 2 to 4 minutes until the liquid is mostly absorbed and the wrappers look tender and translucent.
The timing on this steam phase depends on how thick your wrappers are and how hot your burner runs, so start checking around the 2-minute mark. You want the liquid mostly evaporated but not completely gone because that last bit of moisture keeps the tops tender while the bottoms stay crispy.
Here’s a pro tip that’ll save you some cleanup headaches: dust your pan with a little extra cornstarch before adding the oil. It creates an extra barrier between your dumplings and the pan, which means less scrubbing later and more even browning.
Some people skip this step, but why make life harder for yourself when a simple dusting of cornstarch can prevent your beautiful potstickers from becoming permanent pan decorations?
Crispy Homemade Pork Potstickers Substitutions and Variations
Half the beauty of this potsticker recipe lies in how easily you can swap ingredients around to match whatever’s lurking in your fridge or accommodate different dietary needs.
Ground chicken or turkey work beautifully instead of pork.
Vegetarians can substitute crumbled firm tofu or finely chopped mushrooms.
Can’t find oyster sauce? Soy sauce does the trick.
Feeling adventurous? Toss in some water chestnuts for crunch, or add a pinch of red pepper flakes for heat.
Fresh cilantro brightens everything up, while sesame oil adds that nutty depth I’m always craving.
Even the cooking method’s flexible – steam them entirely for softer dumplings, or skip steaming for extra-crispy bottoms.
What to Serve with Crispy Homemade Pork Potstickers
While potstickers shine as the star of any meal, I’m always torn between keeping things simple or going all-out with complementary dishes.
For simple sides, I reach for steamed jasmine rice or crispy Asian slaw. The rice soaks up any leftover dipping sauce, while slaw adds invigorating crunch.
When I’m feeling fancy, hot and sour soup makes an elegant starter. Stir-fried bok choy with garlic brings color to the plate.
Don’t forget dipping sauces. I mix soy sauce, rice vinegar, and chili oil for the perfect balance of salty, tangy, and spicy flavors.
Final Thoughts
These golden-brown beauties aren’t just another dumpling recipe, they’re your ticket to impressing dinner guests without breaking a sweat.
I honestly can’t think of a more satisfying cooking project that delivers restaurant-quality results at home.
The crispy bottom, tender top combination never gets old. Plus, you can make huge batches and freeze them for those nights when you need something special but don’t want to start from scratch.
Trust me, once you master the pleating technique, you’ll find yourself making excuses to whip up another batch.
Crispy Homemade Pork Potstickers

Ingredients
- ½ pound ground pork
- 1 cup finely chopped cabbage
- 2 green onions finely chopped
- 2 cloves garlic minced
- ½ tablespoon minced ginger
- 1½ tablespoons rice vinegar
- ½ tablespoon oyster sauce
- ½ teaspoon cornstarch plus more for dusting pan
- ⅛ teaspoon black pepper
- 1 12-ounce package potsticker wrappers
- 2 tablespoons peanut or vegetable oil
- ⅔ cup low-sodium chicken broth
Instructions
- Combine ground pork, chopped cabbage, green onions, minced garlic, ginger, rice vinegar, oyster sauce, cornstarch, and black pepper in a large bowl. Mix thoroughly until well combined.
- Place 1 teaspoon of filling in the center of each potsticker wrapper. Wet the edges with water and pleat the edges to seal completely, creating a half-moon shape.
- Heat oil in a large non-stick pan over medium-high heat. Dust the pan lightly with cornstarch to prevent sticking.
- Add potstickers to the pan, crimped side up, ensuring they don’t touch each other. Fry until bottoms are golden brown, about 3-4 minutes.
- Carefully add chicken broth to the pan, cover immediately, and cook until liquid is absorbed and wrappers are tender, 2-4 minutes.
- Remove lid and let any remaining liquid evaporate. Serve immediately while crispy.
Notes
Nutrition
Frequently Asked Questions
Can I Freeze Uncooked Potstickers for Later Use?
I recommend freezing uncooked potstickers on a baking sheet first, then transferring to freezer bags. You can cook them directly from frozen, adding extra time for steaming.
How Do I Prevent Potstickers From Sticking to the Pan?
I prevent potstickers from sticking by dusting my pan with cornstarch before heating the oil. I also make sure the oil’s hot enough before adding the potstickers and don’t move them during initial frying.
What’s the Best Dipping Sauce for Pork Potstickers?
I’d recommend mixing soy sauce with rice vinegar and a touch of sesame oil. You can add chili flakes for heat or minced garlic for extra flavor. This classic combination perfectly complements the pork.
Can I Bake Potstickers Instead of Pan-Frying Them?
I’d recommend against baking potstickers since you’ll lose that signature crispy bottom texture. The pan-frying method creates the perfect contrast between the golden, crunchy base and tender steamed top that defines authentic potstickers.
How Long Do Leftover Cooked Potstickers Stay Fresh?
I’d store your leftover cooked potstickers in the refrigerator for up to three days. I recommend reheating them in a skillet to restore crispiness, or you can microwave them for convenience.