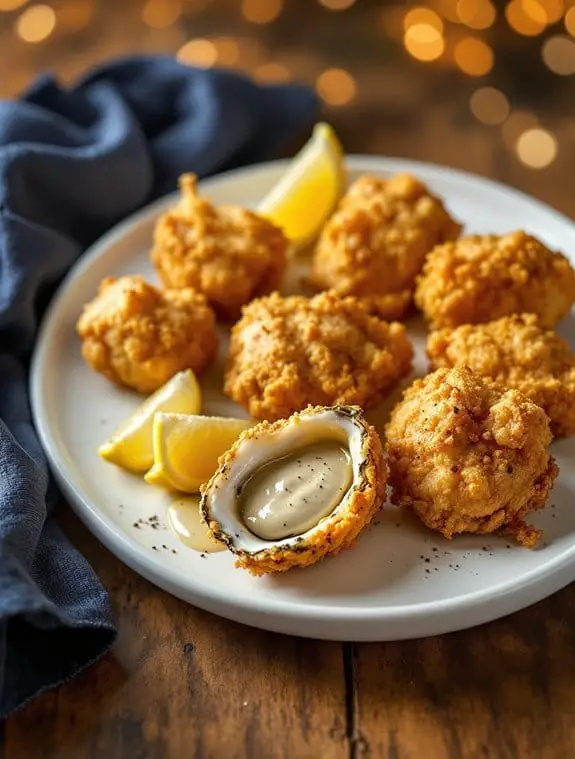
Crispy Southern Fried Oysters Recipe: Golden-Brown Perfection

I’ll be honest with you – I’m about to share something that might just ruin your relationship with restaurant fried oysters forever. Once you master this golden-brown magic at home, you’ll wonder why you ever paid twenty bucks for what amounts to a handful of these briny little treasures. The secret isn’t just in the coating, though that matters more than you think.
Why You’ll Love these Crispy Southern Fried Oysters
While other appetizers might leave your guests politely nodding, these crispy Southern fried oysters will have them practically licking their fingers.
I’m telling you, there’s something magical about that golden, crunchy coating giving way to tender, briny oyster inside.
You’ll get that perfect contrast of textures – crispy outside, creamy center – without any fancy techniques. Just simple dredging and frying.
The seasoning blend hits all the right notes: salty, peppery, with just enough cayenne to make things interesting. Plus, they cook in under four minutes, so you won’t spend forever hovering over hot oil.
What Ingredients are in Crispy Southern Fried Oysters?
The beauty of this recipe lies in its simplicity – you probably have most of these ingredients sitting in your pantry right now. We’re talking basic pantry staples that come together to create something absolutely spectacular. No need for a trip to three different specialty stores or ingredients you can’t pronounce.
The star of the show is obviously fresh oysters, but the supporting cast is just as important. Each ingredient plays its part in creating that perfect golden crust that’ll make your taste buds do a little happy dance.
Ingredients:
- 1/2 cup fine breadcrumbs
- 1/4 cup all-purpose flour
- 1 teaspoon salt
- 1 teaspoon fresh ground black pepper
- 1/8 teaspoon ground cayenne pepper
- 1 dozen fresh oysters (shucked and drained)
- Vegetable oil for frying
Ingredient Considerations
Let’s talk about those oysters first, because honestly, they can make or break this whole operation. Fresh is non-negotiable here. If you’re buying pre-shucked oysters, make sure they smell like the ocean, not like, well, something that’s been sitting around too long. They should look plump and have that clear, slightly milky liquor around them.
The breadcrumbs matter more than you might think. Fine breadcrumbs give you that delicate, even coating that won’t overpower the oyster. You can make your own by pulsing some day-old bread in a food processor, or grab a container from the store – whatever works for your schedule.
Fresh ground black pepper will give you so much more flavor than that dusty stuff that’s been sitting in your spice rack since 2019. Same goes for the cayenne – a little goes a long way, so don’t get heavy-handed unless you want your guests reaching for milk.
For the oil, you’ll want something neutral with a high smoke point. Vegetable oil, canola oil, or peanut oil all work perfectly. You’ll need enough to get a good 3-inch depth in your pot, which might seem like a lot, but trust me, shallow frying just won’t give you the same results.
How to Make these Crispy Southern Fried Oysters
Envision this: you’ve got your ingredients lined up, your oil is heating up, and you’re about to make some magic happen. The beauty of fried oysters is that they cook fast – like, blink-and-you-miss-it fast – so having everything ready before you start is going to save you from that frantic scrambling that somehow always happens when hot oil is involved.
Getting Your Oil Ready
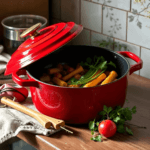
First things first, pour that vegetable oil into your heavy Dutch oven until you’ve got about 3 inches of depth. This might seem like you’re using half a bottle, but proper depth is what gives you evenly cooked oysters. Crank the heat to medium-high and watch that thermometer like it owes you money. You want exactly 350 degrees – not 340, not 360, but right on that sweet spot.
If you don’t have a thermometer, you can test it the old-school way by dropping a small piece of bread into the oil. It should sizzle immediately and turn golden in about 60 seconds when your oil is ready.
Prepping Your Coating Station
While that oil is heating up, grab a shallow bowl and combine your 1/2 cup fine breadcrumbs, 1/4 cup all-purpose flour, 1 teaspoon salt, 1 teaspoon fresh ground black pepper, and 1/8 teaspoon ground cayenne pepper. Give it a good stir until everything looks evenly distributed. You want every single oyster to get the same flavor treatment.
Make sure your dozen fresh oysters are properly shucked and well-drained on paper towels. Any excess liquid is just going to make your coating soggy and cause some serious oil splatter when they hit the hot oil.
The Dredging Process
Now comes the fun part – and honestly, it’s kind of mesmerizing once you get into a rhythm. Take each oyster and roll it around in that seasoned breadcrumb mixture, making sure every nook and cranny gets coated.
You want complete coverage, but you’re not trying to bury the poor thing either. A nice even coat that’ll turn golden and crispy is what we’re after.
Some people like to set up an assembly line, coating all the oysters at once, but I find they stay crispier if you coat them in small batches right before they go into the oil.
Frying to Perfection
Here’s where things happen fast, so stay focused. Carefully lower your first batch of coated oysters into that 350-degree oil.
Don’t overcrowd the pot – you want them to have room to float freely and get golden on all sides. Depending on the size of your pot, probably 4-6 oysters per batch is about right.
They’re going to sizzle like crazy the moment they hit the oil, which is exactly what you want to hear. Let them fry for 3-4 minutes per batch, watching as they transform from pale and boring to gorgeous golden brown.
You’ll know they’re done when they’re floating and that coating looks like crunchy perfection.
The Final Steps
Use a slotted spoon to fish those beauties out of the oil and transfer them immediately to a plate lined with paper towels. This drains off any excess oil while keeping that coating crispy.
And here’s the important part – serve them immediately while they’re still hot and that coating is at its absolute crispiest.
The whole process from start to finish takes maybe 15 minutes once you get going, but the results are so worth those few minutes of careful attention.
Trust me, there’s nothing quite like biting into a perfectly fried oyster with that crispy exterior giving way to the tender, briny goodness inside.
Crispy Southern Fried Oysters Substitutions and Variations
Look, I get it – sometimes you open your pantry and realize you’re missing half the ingredients, or maybe you just want to shake things up a bit.
No breadcrumbs? Crushed crackers or cornmeal work beautifully. I’m talking saltines, Ritz, even corn flakes if you’re feeling adventurous.
Want more heat? Double that cayenne or throw in some paprika.
Feeling fancy? Add dried herbs like thyme or oregano to your coating.
Can’t find fresh oysters? Jarred ones work fine, just drain them really well.
Some folks even use this same technique for clams or scallops.
What to Serve with Crispy Southern Fried Oysters
When you’ve got a plate of golden, crispy fried oysters in front of you, choosing the wrong sides is like wearing flip-flops to a black-tie event – technically possible, but you’re missing the point.
I always reach for classic Southern accompaniments.
Coleslaw brings that cool, crunchy contrast you need.
Hush puppies? They’re basically mandatory – crispy on crispy just works.
French fries make perfect sense here, especially with a squeeze of lemon.
Mac and cheese adds richness that complements the briny oysters beautifully.
For sauces, I keep cocktail sauce, tartar sauce, and hot sauce within arm’s reach.
Final Thoughts
Perfect sides and sauces can turn a good meal into something memorable, but here’s what really matters: these fried oysters are best when they’re straight from the oil, still crackling with heat.
I won’t pretend this recipe will change your life, but it’ll definitely improve your Friday night. The magic happens in those first few bites when the coating’s still crispy and the oyster inside is warm, briny perfection.
Don’t overthink it. Good oysters, hot oil, simple seasonings.
Sometimes the best cooking is just about not messing up something that’s already pretty great to begin with.
Southern Fried Oysters
Equipment
Ingredients
- 1/2 cup fine breadcrumbs
- 1/4 cup all-purpose flour
- 1 teaspoon salt
- 1 teaspoon fresh ground black pepper
- 1/8 teaspoon ground cayenne pepper
- 1 dozen fresh oysters shucked and drained
- Vegetable oil for frying
Instructions
- Pour vegetable oil to a depth of 3 inches in a heavy Dutch oven and heat over medium-high heat to 350°F.
- Combine breadcrumbs, flour, salt, black pepper, and cayenne pepper in a shallow bowl.
- Dredge oysters in the seasoned mixture, coating completely on all sides.
- Fry oysters in batches until golden brown, 3-4 minutes per batch.
- Remove oysters and drain on paper towels.
- Serve immediately while hot and crispy.
Notes
Nutrition
Frequently Asked Questions
How Long Do Fresh Oysters Stay Good in the Refrigerator?
I’d recommend using fresh oysters within 1-2 days of purchase when stored properly in your refrigerator. Keep them on ice in a shallow dish, covered with a damp cloth for best results.
Can I Use Frozen Oysters Instead of Fresh Ones?
I’d recommend using fresh oysters for best results, but you can substitute frozen ones. Just thaw them completely and drain well before dredging. They’ll be slightly less plump but still delicious.
What’s the Best Oil Temperature for Frying Oysters?
I recommend frying oysters at 350 degrees Fahrenheit, as stated in the recipe. This temperature guarantees they’ll cook quickly in 3-4 minutes per batch while developing that perfect golden-brown crust without overcooking.
How Do I Know When the Oysters Are Fully Cooked?
I’ll know your oysters are fully cooked when they’re golden brown and float to the oil’s surface, which typically takes 3-4 minutes. They’ll have crispy exteriors while maintaining tender, juicy centers inside.
Can I Make the Breading Mixture Ahead of Time?
Yes, I can prepare the breading mixture ahead of time. I’ll combine the breadcrumbs, flour, salt, pepper, and cayenne in a bowl, then store it covered at room temperature until I’m ready to fry.